
and finishing with this:

To start off, open a new tab on your computer's browser so you can hop back and forth between here and there. In the new tab, visit Picnik.com and click the "GET STARTED NOW" button. In the new window that pops up, you'll see a tab at the right top side of the screen that says HOME and LIBRARY. Click on LIBRARY or UPLOAD PHOTOS NOW and choose the GET FROM COMPUTER option. (I've highlighted this feature in a grey circle.)
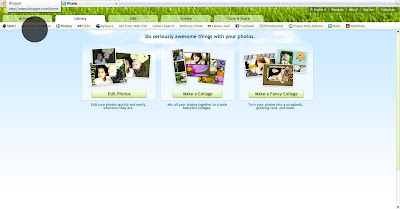
Once you have uploaded your photo, you will see a screen with your picture in it, and new tabs for you to choose from.
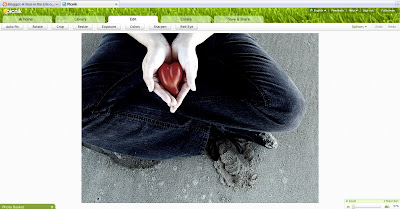
We want to go to the CREATE tab. In the CREATE area, you will scroll down your options in the EFFECTS tab. This tab can be found in a subcategory row of tabs just below the home, library, edit, create and save&share tabs. Scroll down until you see the DOODLE effect on the left side. Click on it, and the view highlighted in the grey circle below will show. Once you're there, change your brush color to the color you'd like your background to be. For this tutorial, I'm using black. Enlarge your brush size if you'd like to (i did) and start painting over the areas of your photo you don't want.
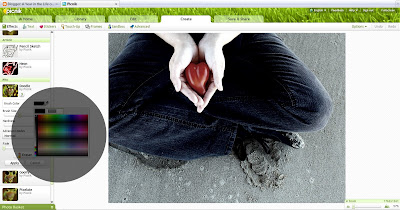
I use a large brush to start with, getting close, but not precisely close to the areas I'm going to leave alone. Use your mouse like a spray can of paint. Hold the mouse button down and move the mouse around to create a steady "flow" of paint, or use clicks to shoot bursts of color. For my large work especially, I hold down and spray away.
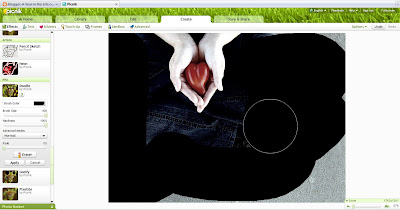
Once I've gotten all my large surface covered, I shrink my brush, and move to the more precise work of getting near the edge of the areas of image I am not going to cover over. Even though I call this work "precision" work, it's not so important that you have exact detail. Work your paint brush smaller, and fade the "hardness" of your brush as well to help you in getting as close to your edge as you can.
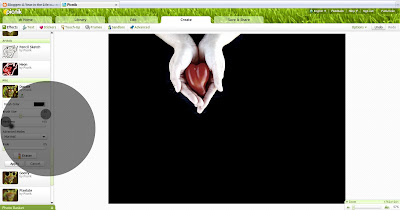
I actually go over the edge a little, because you can then switch your brush to ERASER and clean up the line more once you're done. As you can see, there are a few edges that I overlapped into the area I don't want covered. Erasing them is easy. Just click on the eraser button, and click on any areas you need to undo.
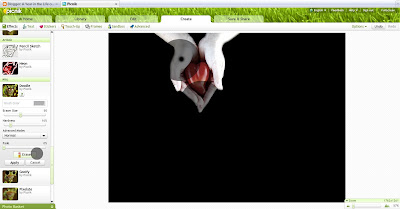
Once you're all cleaned up, you'll click APPLY and move up the effects list to TINT. Click into tint, and this is what you see. If you don't see the top right grey circle's information, click on the paintbrush in the larger circle in the lower left. You'll also want to move your tint OUT of the blue zone, and up to the white. This will make your photo look black and white. That's what we want.
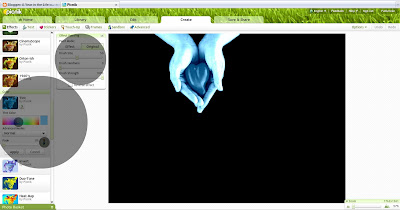
NOW, you should take your brush, and start to "spray" over the areas you want to stay black and white in the end. For now, you're letting the color of your photo show, and eventually, we'll reverse the effect to make everything "right". You can switch back and forth between the "effect" and "original" buttons to get clean lines between your edges. Use your brush size to help you with precision areas. I don't worry about uncovering the black or white areas of photos, because they will not change when you click the REVERSE EFFECT button.
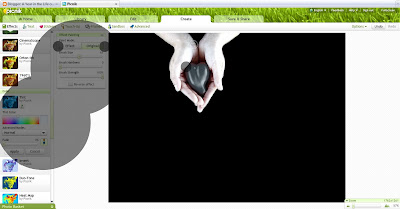
Go ahead and click. SEE?!? Isn't it cool? If you see areas that you missed, unselect reverse effect, and keep working at it! Click apply when you are done.
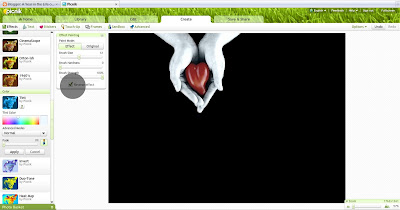
I love a feature called ORTONISH. I used it on the photo without edits to the effect on my photo.
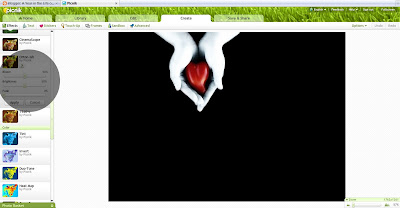
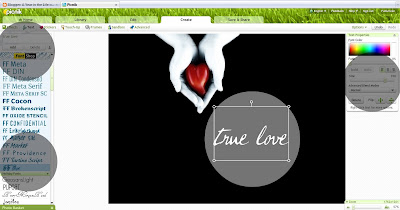
THEN, I headed up the screen and into the TEXT effect. There are all sorts of fonts available for free as well as many more in the premium account features. I chose a free font for this project. To add text, enter your text into the box at the top left that says "type here to add text". Once you have the words you want, click ADD, and the words will come up in the middle of your picture. You can change color, size and some other things in the box to the right, (which sometimes shows up on the right depending on your font and it's placement) You can also click and drag your text around on your photo. When you are done, head to the SAVE AND SHARE tab, and choose where you would like to save your photo!! Happy editing!!

© Rachel Whetzel Please do not use content or images without written permissions.

2 comments:
Wow, I use Picnik alot but never knew about this!!! Thanks for the great tutorial, I will be trying this for sure!! I love how you did this!!!
Rachel, thanks for sharing your knowledge in this tut...I really appreciate it, and also thanks for visiting my blog~
Post a Comment